"BIG FOOT 41"
or
2007_03 till 08
or
"What
happened whilst the last months!"
In summer 2006 I
had bought an ex German army 28V, 73 Ampere Diesel generator with noise
insulation and had the luck that it was one of the rare with starter motor! The
idea was to mount it at the trucks frame. A place was identified quickly,
the move of the starter batteries into the cabin
was done by purpose (pls. refer to here) plus
the move of the air tanks into the frame (please refer to here), only the
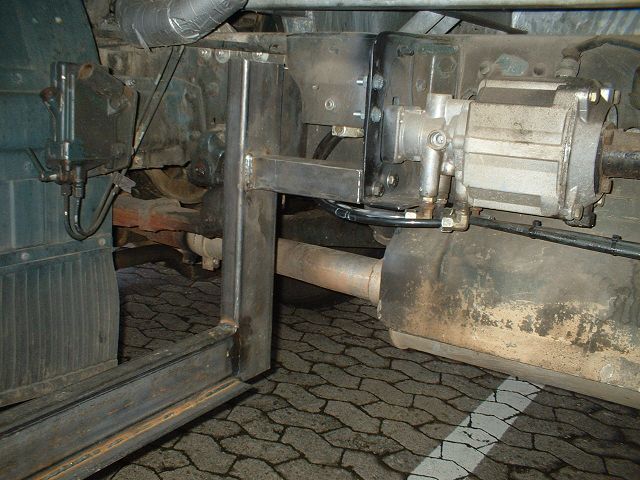
master brake cylinder remained. So I welded in March 2007 two supports to fit
the generator, her the one in front
:
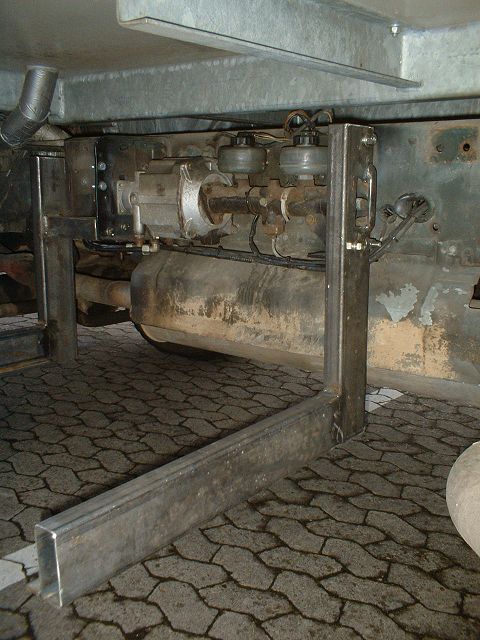
the rear:
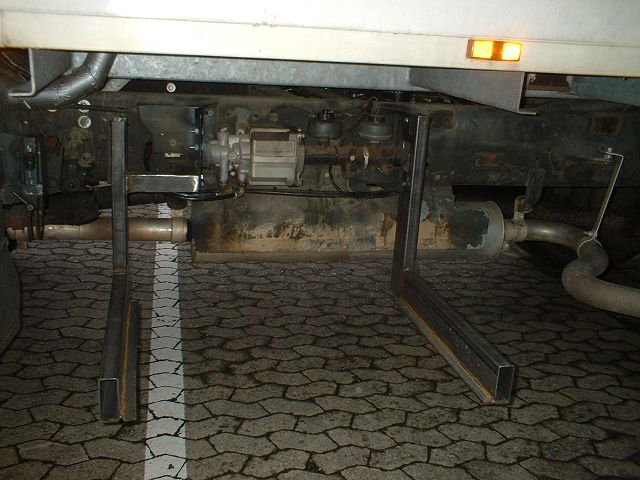
and here
the overview:
But
exactly the master brake cylinder which you can see in the middle interfered too
much with the generator and as a result it reached out too much over the edge of
the cabin. So the idea was to modify the housing of the generator.
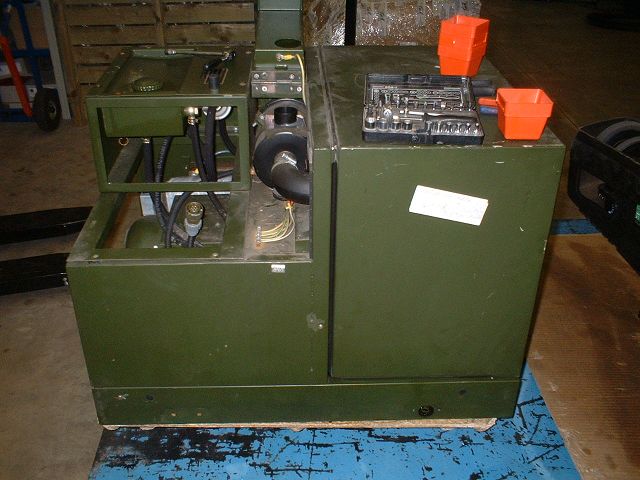
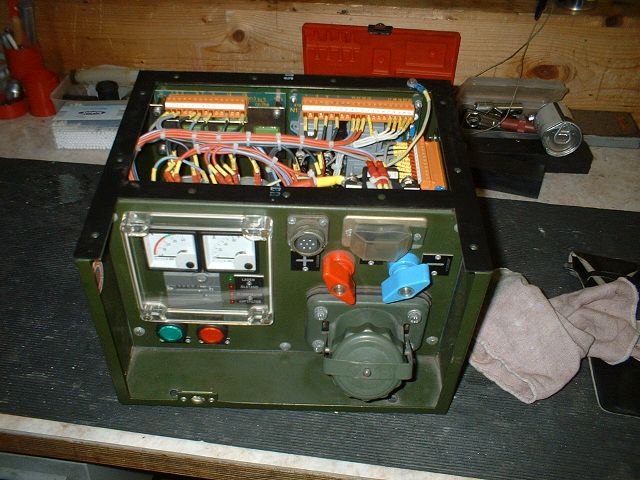
Here you
see the already taken off control unit. All the control panels and on- and
off-switch I wanted to have in the cabin , the emergency switch-off plus
connector should move the side, connector for remote control was for my purpose
no longer required. So once taken off I could fit a plain piece of metal and cut
off the rest of the housing till here.
But first
I had to extend the cables for the controls and switchers by using two different
trailer sockets, which will be connected with multi-wire cables and trailer
cable plugs. So the complete unit can be (dis-)connected quickly and easily
without mixing up, the connection for the Diesel to the main tank is anyhow by a
standard Army quick-release connector.
Here nearly
ready, only the second trailer connector is missing:
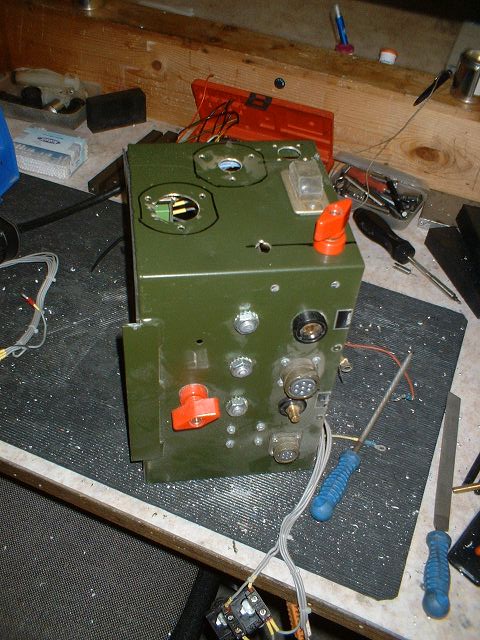
When
cutting off the housing walls I wondered a little bit that there weren’t that
many sparks but found out very quickly the reason when I wanted to weld the
walls into the new, L-shape form: Army lightweight! Aluminium!! I don’t want to
know what the beast would weight in normal metal, even with Aluminium housing it
was already 150 kg!! OK, welding iron is OK for me but Aluminium??? What would I
do without knowing Franz-Jakob and his
company! So his expert for Aluminium - Tobias – formed some new parts and
welded for me in a view hours in a perfect way the new shape of the housing.
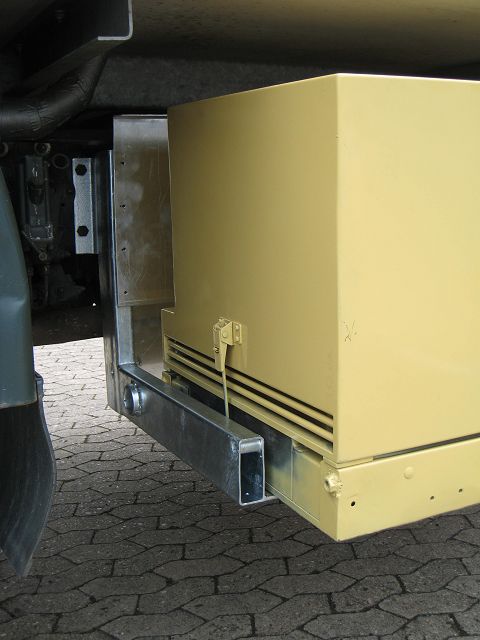
Before putting the generator into the support I pre-sprayed and then sprayed in
colour RAL 1002. Here you can see the new L-shaped design and the modified
control unit:
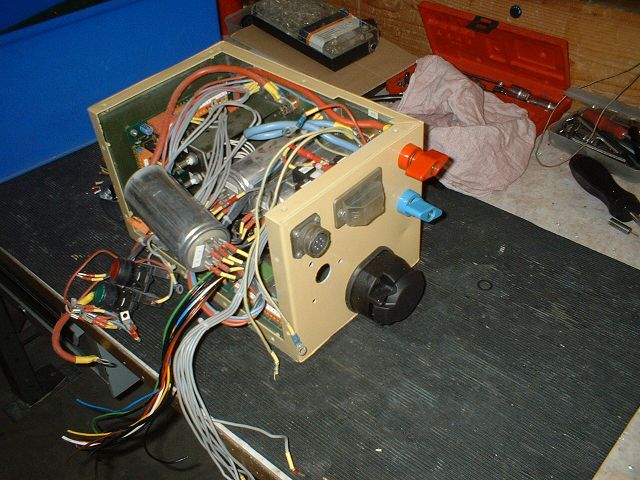
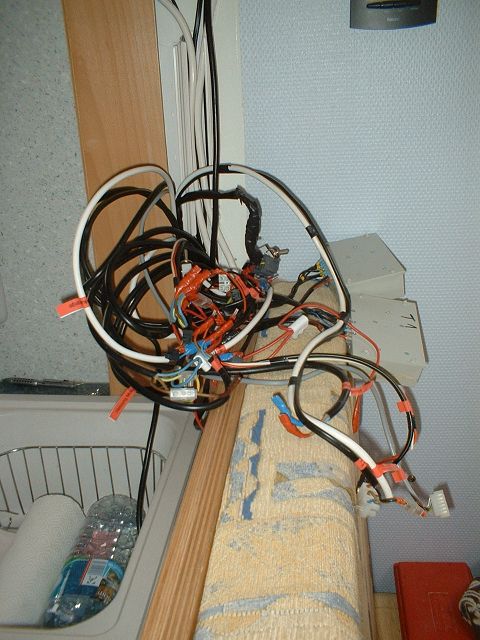
As
mentioned before the cables were extended into the cabin to built everything
into the control panel. This shows the disaster BEFORE adding the additional
cables (it more than overdue that I spend some time to lay the cables perfect
and to add some connectors for quick disassembly – at least I think to have all
the required parts!:
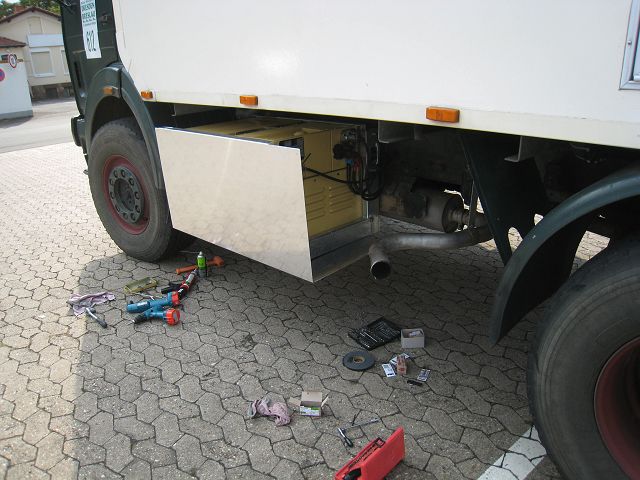
The
supports were galvanized and – again – with the fantastic and gracious support
from Franz-Jakob and Tobias I built an additional cover for the generator. The
additional cover is required because even when driving on wet streets lots of
dirt and water got through the air inlet into the original housing. So if really
crossing a river or so it would be completely flooded! Here you can see in the
background already the rear part and at the end of the vertical support the a
welded in tube to extend the exhauster.
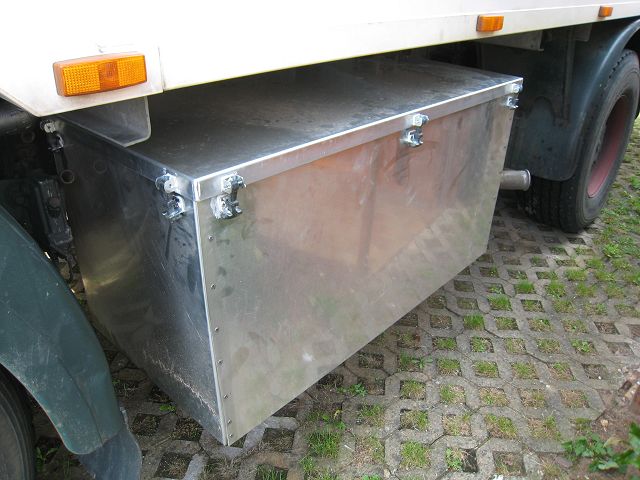
A view
from the rear including the housing which cover bottom and front in one piece.
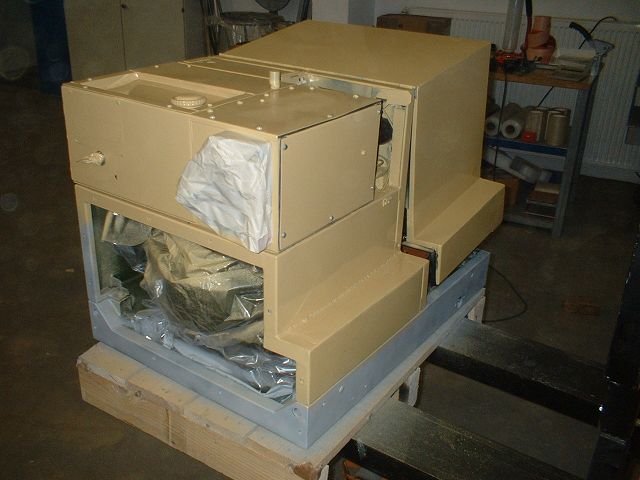
This is
the new cover with all parts mounted, including the top cover fixed by rubber
type fasteners. The different parts are hopefully well enough water proved
mounted together by using foam rubber in between., same applies for the top
cover.
What
still misses: I need three waterproof shutters, ideal would be driven by motor:
1x for the exhaust, 1x for the air intake and 1x for blowing out the hot air. My
wish is to push a button before I start the generator which opens all three
shutters and simultaneously fans start to support the normal ventilation. Three
waste water shutters with ~ 9 cm (3”) should be sufficient and with ~. EUR 25,-
pricewise OK.BUT ONE motor to open / close the shutter costs as a standard part
~ EUR 170,-. This is definitely too much for that little bit of comfort,
especially because I need it for all three or nothing. So I have to look for
another solution, update hopefully soon! :-)
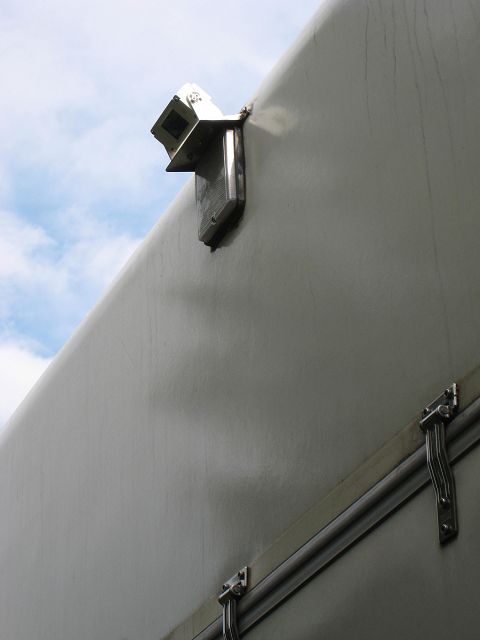
The rear
camera from the well-known manufacturer Waeco had more and more problems to
start. After the last tour it went completely into strike. So I made a bid in
Ebay for a “cheap” alternative: Colour instead of Black & White, including LED’s
and specified 1 LUX sensitivity, integrated microphone, waterproved housing up
to IP 67 and 160° wide angle lens.
I was afraid to lay new cables all the finished cabin but luckily the cabling
from the Waeco had sufficient additional wires (although quite thin). In
addition I was now more then lucky that I had laid the audio cable
when I installed the 7” monitor in the drivers
cabin (please refer to here on the bottom) - although I didn’t see the
reason in those days … but now I was lucky to have done it. Mounting the camera
in the rear was the easiest job, more tricky was the connection of the different
cables. So now I am enjoying a nice colour picture by daylight and even at night
I see at least without the rear lights a little bit in black & white (night
modus). I am curious how long this “low-cost” version will last compared to the
brand-label.
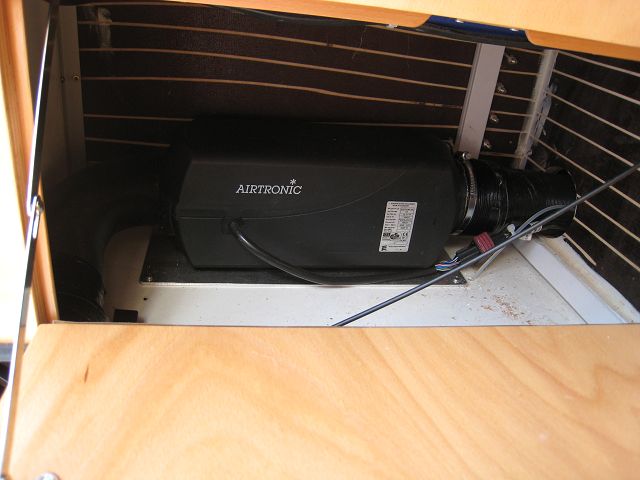
On a tour
last year in autumn the air heating had failed! Due to the good isolation of the
cabin it was still warm enough in the morning, but .... .
So redundancy was required and an identical, additional Eberspächer hot air
heating was integrated into the air ventilation system. With a shutter it is
possible to split the ventilation circuit so that both heaters are working
simultaneously but for different areas (I hope that my calculation for the air
flow due to the installation manual was correct).
In the
same go I installed the new, additional diesel pumps for the heating system for
elevations ABOVE 1.850 metre. Reason: The higher you get the thinner the air
will be and in comparison the normal pump will supply to much diesel which will
cause functionality problems with the heating units. The solution are special
pumps with a lower rate. Unfortunately the water heating has its diesel pump
integrated into the housing, so currently the fifth diesel pump is not built in.
So here I have to consult the local Bosch service for their advice or ask some
friends for their ideas to switch off the built in one and use only the
additional one.
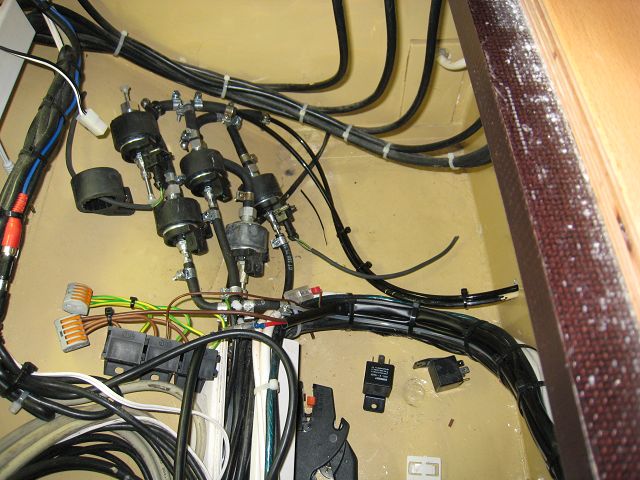
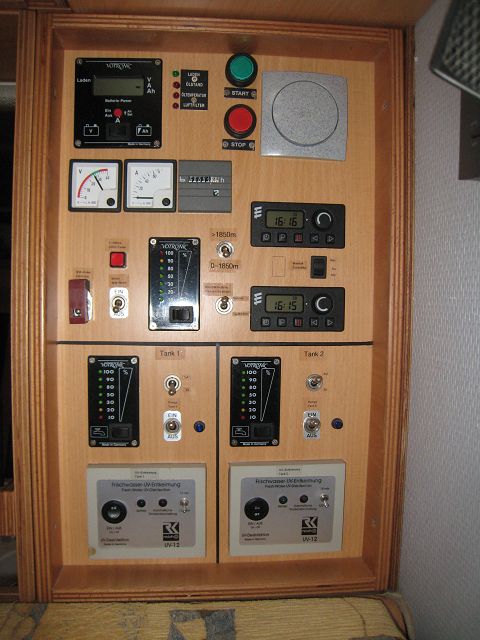
To switch
all together in one go the pumps are operated by a relay. The sockets for the
relays are already fitted but the relays themselves not (on the picture). The
switch is integrated in the switch board, on the right you can see the two timers
for the air heaters.
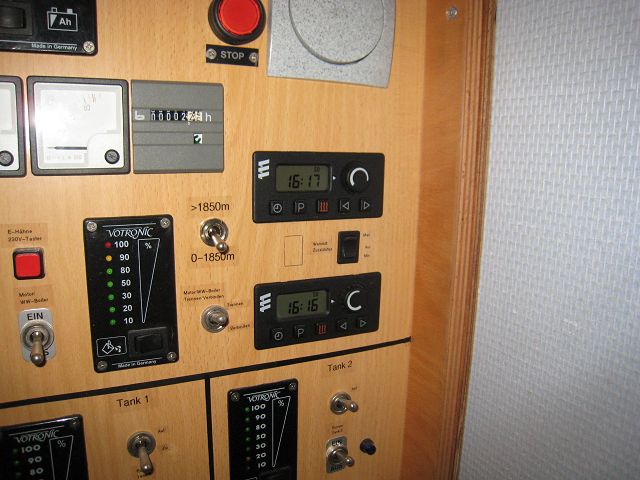
And the
complete switch board including the items from the generator now looks as
follows:
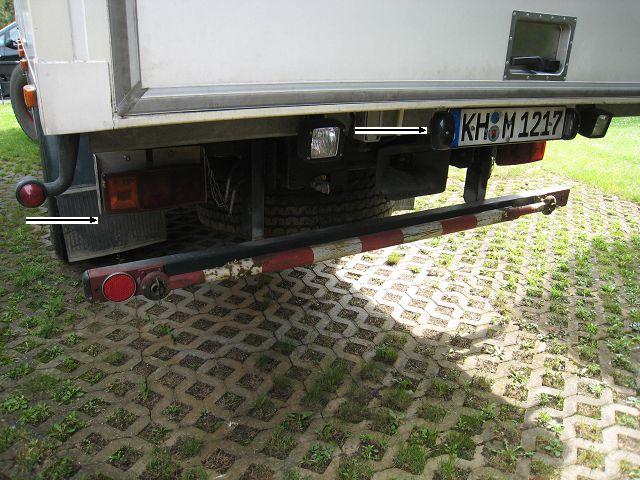
Last but
not least a modification which will increase the rear ramp angle respectively
will minimize distorsion e. g. when driving though. The registration plate
underneath the reaer lamps
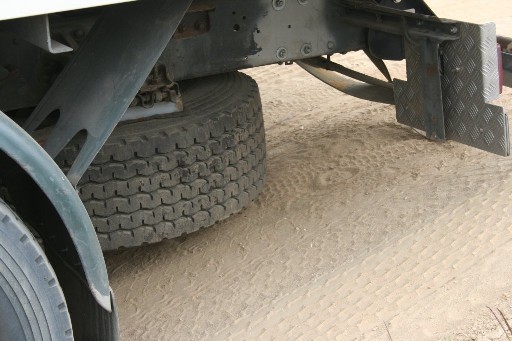
was moved to the middle of the
cabin. The previous bottom end under the rear lights was cut off..
Sorry that it
was so much more then usual but it was as well a long time since the last update
and I had hoped to finish some bits earlier and so to send different updates.
But finally everything was (more or less!!) finalised all together.
To be
continued!!!
 Besucher/Visitors
